
Miniature painting can be a fun hobby even if you don’t consider yourself a painter. Practice and experience is the best way to learn something new, and this guide is here to help you get started. It provides information for those interested in this hobby, including resources you will need from brushes to holders and tips to avoid pitfalls.
Contents of this Page
Guide For Painting Miniatures For Beginners
Why Paint Miniatures
Miniatures are small models in various scales that usually come unassembled and unpainted. You can use them for different things ranging from board games to dollhouses. People commonly paint miniatures for a game they play, especially wargames or tabletop role-playing games such as Infinity or Warhammer 40K.
A wargame usually involves using dice to determine outcomes in a battle between two or more players. By picking up this hobby, you can spice up the game with customized characters.
If you are a dollhouse enthusiast, learning how to paint miniatures can add another element of personalization. You can also find busts of various people and characters to paint just for enjoyment and showcasing. Overall, miniature painting is a rewarding hobby that can be affordable with all the different materials and models you can purchase.
Last but not least, the act of painting is known to have health benefits akin to meditation. It can promote stress relief, bolster memory, and stimulate an optimistic attitude. Tackling hobbies like miniature painting also lets you get in touch with your creative side and enhances your problem-solving and motor skills.
What Miniatures to Purchase
You can buy miniatures at hobby stores, game stores, or craft stores such as Michaels. There are plenty of online options for miniature characters, terrain scenery for tabletop games, or miniature furniture for dollhouses. You can also purchase game characters such as this Adeptus Mechanicus Skitarii Figure.
Some websites allow you to customize miniature figures or 3D models for painting. Hero Forge has a database of character types, poses, weapons, and more that you can select to create your miniature. Punga Miniatures allows you to submit a drawing that they transform into a 3D model. You can have it cast from resin or plastic.
It can be less overwhelming if beginners start with painting a miniature with fewer details and color combinations. Once you are comfortable using the painting techniques and elements of color theory, you can gradually progress to more complex models.
Examples of models to start with include a wolf, spider, or humanoid, such as an orc. Zombies can also be a good beginner figure to try painting because it is so forgiving when you mess up.
Any mistake can contribute to the zombie’s skin discoloration, or you can cover it with blood or mud splatters. Zombicide is a board game with pre-assembled miniatures, including wolves and complex characters when you are ready to advance.
Selecting a Workspace

Painting miniatures doesn’t require much space. However, you want to have a comfortable chair and sturdy table. Proper lighting is also important for miniature painting. Dim lighting or shadows can easily cause eyestrain or play with your perception of the miniature’s details.
Perception warping can lead to missing a spot when painting. Moveable lights mounted on arms can be useful for illuminating different angles. You can also buy a desk lamp with a magnifying glass to make it easier to see the smaller details on your model.
Paint Brush Requirements
The type of brushes you buy will impact how quickly you learn to paint miniatures and the various painting techniques. Using the wrong brushes can make you appear like a worse painter than you are. The three types of paintbrushes you should have are:
- Pointed round brushes: has a pointed tip for details and what you will use for most of your painting.
- Round brushes: has a less refined tip and is good for base coating, layering, and painting bigger details.
- Flat brush: used specifically for the dry brushing technique.
When selecting brush sizes, a size two or Citadel Medium Layer Brush is a good overall size. You shouldn’t need a brush bigger than these. A size one is useful for edge highlighting, and size zero useful for fine detail work such as eyes and teeth. If you want, there are also brush sizes that run smaller such as 00.
You can easily purchase brush sets online. Although more expensive than synthetic bristols, it is worth it to purchase natural bristle brushes. They are flexible and soft, making them ideal for miniature painting and easier to clean.
Take Good Care of Your Brushes
It is also important to properly take care of your brushes, so they last. Have a location to store them safely and avoid leaving them bristles down in paint water, or you will ruin the brush. It is best to purchase a brush cleaner and preserver such as this one by the General Pencil Company. Additional tips to taking care of your brush include:
- Don’t hit or grind your brush at the bottom of your cleaning pot, or it will fray the bristles.
- Form the tip of the brush into a sharp point with your fingertips before putting your brush away for storage.
- Dry your brushes after cleaning by gently pulling from the handle to the tip.
- Avoid split bristles by never getting paint in the ferrule, which is the metal area the bristles go in.
Type of Primers and Paints To Use
You will need a primer to undercoat your paints. There are brush-on, airbrush, and spray primers. For beginners, spray primers are usually the easiest to use. Brite Touch is a spray primer brand that is affordable and requires no cleanup or mixing before use.
Choose a primer color based on what colors you want to paint your model. Black is forgiving and can look like shadows if you forget a section. However, it can be hard to put a light or bright color on it. White is better if you are going to paint with bright colors. Grey is a good option to use for beginners because it’s somewhere in between black and white.
When purchasing paints, make sure to use acrylic hobby paints designed for miniatures. You can refer to our list of recommended miniature paints if you’re unsure where to start. These paints are higher pigmented paints, meaning the color density is more intense, so you need less for greater coverage.
You can also easily thin out the paints without breaking them down. Additionally, it dries fast and is waterproof, so the moisture from your hand holding the miniature won’t rub the paint off while painting.
There are plenty of beginner kits online, including ones with colors for wargame miniatures or sets of skin tones only. A recommended brand for beginners is Vallejo’s Intro Set with 16 colors. You can also get larger kits such as the Army Painter kit with 60 paints if you prefer.
In addition to normal paints, you can purchase metallic paints to create authentic metal colors for weapons, armor, and scales. You can also mix metallic paints with normal paints for subtle effects such as dull metals or iron pots.
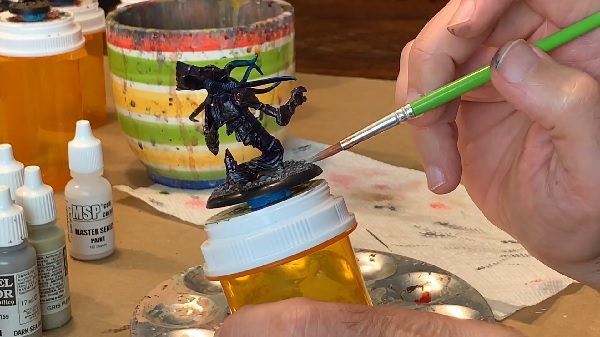
Consider Investing in a Wet Palette
Using a wet palette instead of a traditional palette can help you in multiple ways. Firstly it saves money on paints. A wet palette allows your paints to last all day instead of drying up within 10 minutes. It also prevents dried paint flakes on your brush that can easily ruin your previous layer.
A wet palette also keeps your paints at the thin consistency you prefer. Thin paint prevents you from accidentally layering paints too thick. Instead, you can achieve a smooth thin coat.
If you don’t want to buy a wet palette or prefer a smaller one to fit your workspace, try making one at home. All you need is a wet palette acrylic paper, a palette sponge, and a small container to fit the sponge, such as a soap box. Cut the sponge and acrylic paper to fit the container, add warm water to make it wet, and let it soak for about 10 minutes to activate the acrylic sheet. Then remove any excess water rising above the sponge, and it is ready to use.
Some people prefer not to use a wet palette because it is easier to ensure paint consistency on a traditional palette. Whichever option you choose, make sure you do not paint directly from the paint pots. Doing this can build up paint on the pot’s rim that dries up and makes it harder to close the lid. Unsealed lids can lead to dried-up paints and a wasted paint pot.
Other Equipment You Might Need
The number of additional pieces of equipment you will need depends on the type of miniature you purchased. For example, models that are pre-assembled or have snap-fit figures won’t require glue for assembly. In contrast, multi-part kits have lots of pieces to assemble and require glue. Required equipment can include:
- Citadel plastic glue or Super Glue depending on the requirements detailed in the directions of your miniature packaging.
- Sprue cutters or flush cutters to cut model parts from the sprue.
- Nippers with shaped edges so you can get up against models to clean them without damaging them.
- Hobby knife or mold line remover tool to clean the mold lines and clean up glue seams. There are hobby knife kits you can purchase that also come with a cutting mat to protect your table.
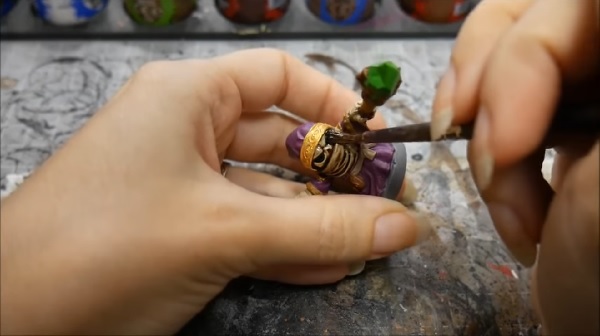
- A miniature holder can be useful, so you don’t have to hold the models directly.
- A lacquer spray to seal your work. See Applying a Sealer section below for details.
- Paper towels to dry your brushes, wipe excess paint, and clean up messes.
- Green stuff to fill small gaps in miniatures.
- Ink washes if you are ready to try this technique. See more information in the Painting Techniques section below.
Brush Up on Color Theories
Understanding the basics of color theory can help you be a better painter. For beginners, it can be useful to copy the colors from someone else who has painted a similar miniature to learn the techniques before getting creative and using your own color combinations.
However, being in the know about why colors pair well together and how to create colors can be useful, especially if you will be mixing colors yourself. For example, you can use just five colors to make hundreds of colors you would normally buy.
To explain the basics of color theory, you have to be familiar with using the Color Wheel. The Color Wheel separates into three main groups of colors: Primary, Secondary, and Tertiary colors. There are three Primary colors: red, yellow, and blue.
By mixing any two primary colors, you can get the three Secondary colors: orange, green, and violet. For example, red and yellow make orange, and blue and yellow make green. To get Tertiary colors, you mix a Primary color with a Secondary color next to it on the Color Wheel. There are six Tertiary colors:
- Red-Orange
- Yellow-Orange
- Yellow-Green
- Blue-Green
- Blue-Violet
- Red-Violet
Another key component of color theories that is useful when painting miniatures is the concept of Complementary Colors. Complementary Colors are two colors located directly opposite each other on the wheel.
These two colors, when used side-by-side on a model, provide a visually appealing contrast. An example is blue and orange. By using Complementary color combinations, you can ensure your miniatures look attractive instead of mismatched in color.
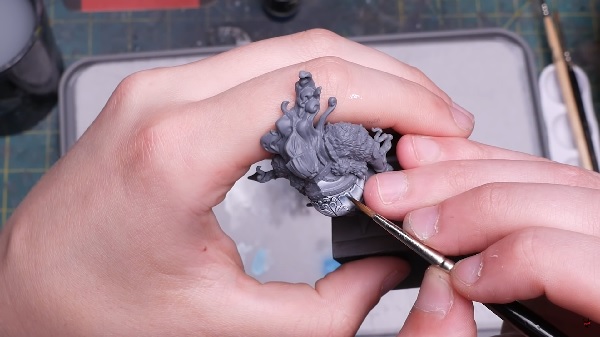
Preparing Your Miniature
First, ensure you remove any mold lines or flash on your miniature model for a more refined result. Mold lines are excess material that gets into the mold area where the two halves of the mold meet. Flash are materials in the vents that allow air to escape the mold. Use a hobby knife or nippers to remove excess material. You may also have to fill gaps with two-part putty (Green stuff) or glue.
It would be best if you also prepare your models for painting by washing them. Use lukewarm water, dish soap, and vinegar to remove any grease or release agents coating the model. Using a soft toothbrush when you wash your models can help you clean both broad surfaces and small crevices.
Make sure not to use hot water because it could bend or misshapen some plastics or resin materials. Drying your miniature with a tack cloth can also pick up any dust on the model without leaving fibers.
Priming Your Miniatures
After you clean the miniature, you have to prime it before painting. Primers, also known as undercoats, create a bonding surface that prevents the paint from rubbing off. You can refer to our list of the best primer for miniatures if you’re not sure which primers to use.
This step is required regardless of what material your model is. For an example of how to provide an undercoat to your miniature, check out this video by Games Workshop.
Tips for priming your miniature:
- Use sticky tacks to secure your model so the force of the spray doesn’t knock it over.
- Attach the model to something like a stick so you can easily turn it while you are spraying.
- Shake the can well, at least 30 seconds.
- Spray 10 to 12 inches away, so the spray doesn’t dry in the air before it hits the model, leaving a fuzzy coating.
- Scrubbing fuzzy areas with a soft toothbrush can buff the area and smooth it out.
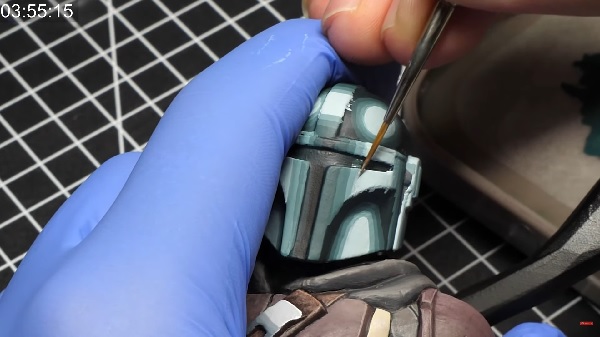
The Basic Painting Techniques
Before you start painting your miniature, you should familiarize yourself with these base techniques hobbyists use.
Layering
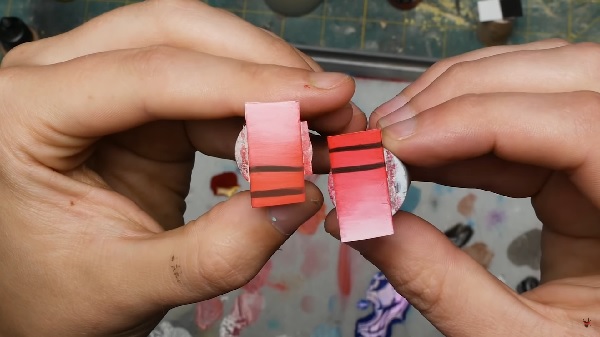
Layering is the first technique you will use to block out colors on your model. You want to build up the paint layers with the details closest to the model’s surface before decorative elements. For example, you would paint the surfaces of armored plates or leather pants first before painting belts. You also want to make sure your brush has a fine tip before painting. Lightly dragging the brush on your palette, twisting it as you go can accomplish this.
Layering different shades of colors can also create shading and highlighting effects. For example, start with a dark color in the areas that get less light, also known as the shade. Then layer over the dark color with a lighter version of it in areas closest to the source of light. For a visual example, here is a Games Workshop on how to paint using the layering technique.
Edge Highlighting
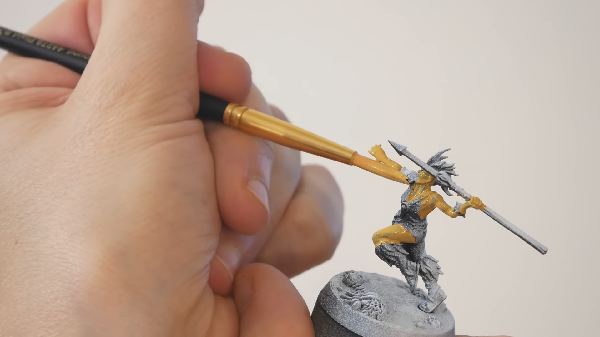
It is best to exaggerate the shadows and highlights on a miniature since they are small. This method allows you to see color depth from a distance. One technique is edge highlighting. You put lighter colors on the edges of your model to show areas light would catch the strongest. Make sure to place your brush at an angle and drag it lightly along the edge.
It is also important to have enough paint loaded onto your brush, about one-third of your bristles. Using a large brush to hold this amount of paint yet small enough so the highlight won’t bleed out from the edges is crucial. The brush should also have a fine tip, such as a pointed round brush. Be cautious not to highlight every edge you see on your model unless that is the style you want. It is more realistic to highlight only the areas that will get the most light. Miniac provides a guide on edge highlighting in this video.
Dry Brushing
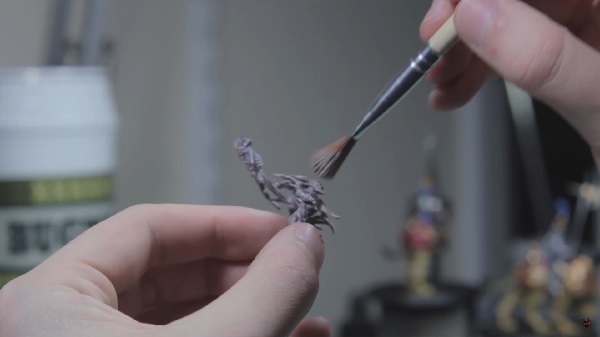
After you are done layering with the basic colors on your model, you can also use dry brushing to create highlights. It is especially effective on textured surfaces. Using a lighter color than the area you will be painting, apply a very small amount of paint onto a dry, stiff brush. Wipe off any excess paint to ensure you have barely any paint on your brush before dragging it across the model.
Make sure your brush bristles don’t fall into the miniature’s recess details. This technique will highlight raised surfaces. Here’s a visual by Citadel Colour on how to dry brush. You can also see in this video how a painting handle can be useful when painting.
Washing
Washes are a quick method to add shading to your miniatures. Beginners are encouraged to try it, but you will have to buy separate wash paints to accomplish this. Washers are thinned-out, watery paint that can build up in areas with depth. Once it dries, those areas will end up with a darker shade to them. It can help you create natural-looking shade in areas such as seams, edges, and textured areas. Here is a video on how to get the best results with washes on miniatures.
You can purchase paint washes that come in dropper bottles online, such as this Army Painter kit of eleven bottles. For a smaller and cheaper package of three bottles, try purchasing the Reaper Master Series’s Washes Triad. This triad comes in brown, black, and flesh colors that are the basic colors you will need to start with if you are on a budget. Since washes are thinned-down colors, they won’t ruin the main colors of your model.
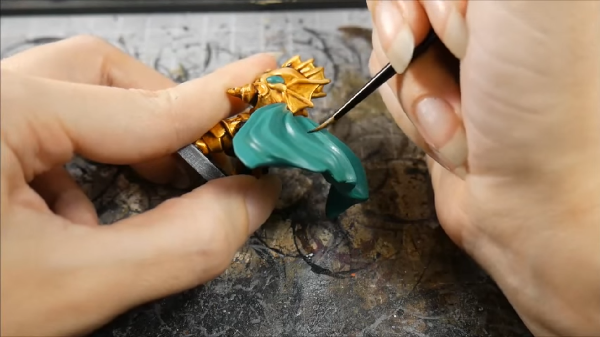
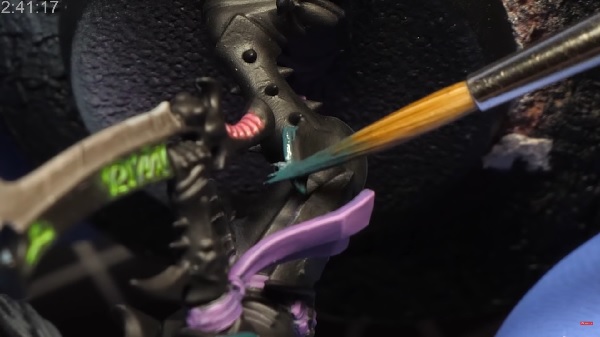
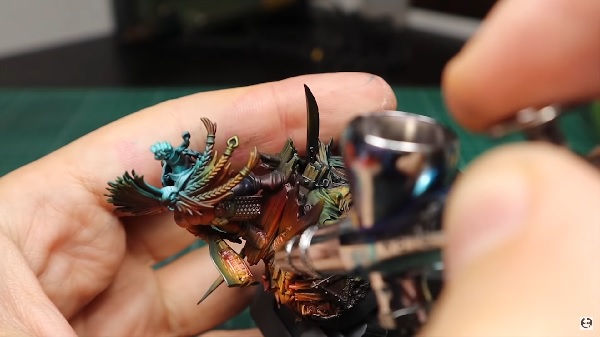
Painting the Details and Finishing Touches
Once you have all the main colors of your miniature done and added highlights in key areas, it is time to fill in the details. You will want to use a very small brush for elements such as eyes, teeth, or logos.
This step is also a chance to get creative. For example, you can use metallic paint for weapons, then use normal paint to add blood on the weapon’s edges. Black can also make certain features stand out visually, such as boots or side pouches.
Lastly, you can use the washing technique detailed above to fill in any fine detail cracks and crevices. Using a dark wash color can add the final layer of shading to your miniature.
Tips for Painting Your Miniature
When painting your miniature, it can be useful to add a drop of water to your acrylic paint and thin it out slightly. This method can make it easier to apply, especially for the layering technique, covering more surface area.
When layering, use thinned paint that can create a one-inch line across your palette surface without beading. You may have to do several coats before getting a solid color, but this technique prevents making the paint too thick. Thick paint can cause lumps or conceal the details of your miniature.
Additional tips for painting include:
- Use two water pots, one for rinsing normal paints and the second for metallic paints. This method prevents the metallic flakes from sticking to your brush for normal colors.
- Edge highlights can be easier with paint you haven’t thinned out when you are a beginner. However, you won’t be able to blend without thin paint.
- Routinely clean your paintbrush and keep them wet while you are painting because acrylic paint dries very fast. Dry paint on the brush can ruin it, including misshaping the bristles.
- Change your paint water often to keep the colors you are using untainted and vibrant.
- Have scrap brushes to use for mixing paint, so you don’t accidentally ruin your brush by getting paint in the ferrule.
Applying a Sealer
Although you don’t have to use a sealer, also known as a varnish, it is an important last step to protect your paintwork. It helps the paint last longer and avoids chipping. It prevents wear and tear from handling the miniatures, including the degradation of the surface from your hand oils when you use them for games.
Additionally, if you drop your miniature, the sealer coat will chip or crack instead of the paint. A sealant can also create a glossy effect that adds vibrancy and prevents the color from fading due to light exposure.
Metal is more chip-prone than resin or plastic, so a couple of thin coats of gloss varnish before using a spray lacquer can help preserve metal miniatures. For resin and plastic, you only need two coats of spray lacquer.
Two good spray lacquers to purchase for sealing are Testor’s Dullcote and Krylon. You can also use airbrush sealers or brush-on matte sealers, such as the Vallejo Matt Varnish. However, similar to primers, spray on’s may be easier to start with for beginners.
If you choose spray sealers, make sure to shake the can enough so you get an even coat of spray each time and prevent a cloudy finish. It is also best to spray about ten inches away and in low-humidity environments and temperatures between 65 – 85 degrees Fahrenheit for the best results.
Other Tips to Consider
Besides the tips already listed in this article, there are some other things to consider before starting the miniature painting journey.
For example, if your plastic or resin miniature comes in the mail with bent parts, you can easily fix this with a hot water trick. Have a bowl of hot water and a separate bowl of water with ice in it.
Submerge the bent part into the hot water for 10 seconds or until the plastic is pliable, correct the bend, and immediately place it in the ice water to re harden the model.
Additional tips include:
- Don’t compare yourself to others. Instead, get inspiration from their work and use that as motivation, not discouragement.
- Keep having fun. If you start feeling tired or discouraged, take a step back and come at it again from a different angle.
- Have realistic expectations. It can take time to master some painting techniques, so don’t expect everything to be perfect.
- Buy multiple brushes in case you wreck one while you are learning.
- Use proper ergonomics during painting to prevent wrist problems or back pains from poor posture.
- Sign and date your work so you can remember when you finished it and look back on your progress years later.
- Spray primers and sealers in a well-ventilated area and with a face mask to avoid being overwhelmed by the fumes.
Intermediate and Advanced Techniques to Explore Next
Make sure you have the essentials down before trying intermediate or advanced painting techniques to avoid discouraging yourself too soon.
However, knowing where the base skills of miniature painting can take you can also be inspirational. So, once you are ready to venture into the next level of your miniature painting hobby, try these intermediate and advanced methods below.
Glazing
A glaze is a translucent, thin paint that you can apply to an area of your miniature to change the tone of the paint. It is useful as a basic blending technique to smooth out colors and add visual interest to something. Sometimes if you paint an area and feel one section of the color needs a slight shift in tone, glazing can help accomplish this effect. It prevents you from having to repaint everything with the primer, layers, and highlights again.
You can purchase different color glazes depending on what result you want. For example, there is Waywatcher Green or Bloodletter red that are commonly purchased. Here’s a video example of how to utilize different color glazes on your miniature.
Weathering
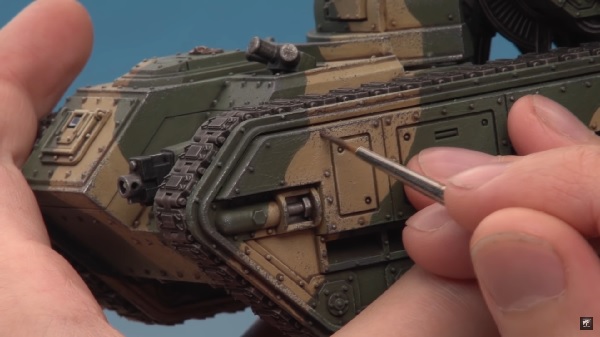
Weathering techniques can be a fun addition to add character to your model, especially if you are painting miniatures for wargames.
You can add features such as worn-off paint, scruffs, and scratches to represent weathering of scenery items such as boxes, vehicles, and buildings. You can also go an extra step and add details representing elements of battle damage like bullet holes, scorch marks, or sword scratches.
An example of adding scruffs is to use a highlight color and paint random lines on your base color. To turn some of these scruffs into scratches, take black and paint a line above the highlight to create depth.
For holes, you want to start with a black circle and then use a light highlight color around the bottom edge to create depth. You can produce paint chip effects or discoloration by using a sponge to dap on paint, similar to the dry brushing technique.
For visuals on how to add chipped armor, grime, and mud to your miniature, watch this video on weathering and battle damage techniques.
Blending
This blending technique refers to creating a gradient of colors by painting smooth transitions between layers. You can accomplish blending by using layering, glazing, or a combination of both techniques.
The blending basics with layering start with a base color and use a lighter shade to add layers gradually. It is easier to make colors darker as you paint on more layers. Other types of blending methods include wet blending, feathering technique, and loaded brush blending.
Wet blending is when you blend paint while the existing paint on your miniature is still wet. The feathering technique is when you load your brush with paint and “feather” it on the surface area you are painting until the paint is exhausted from the brush.
Another feathering method is to apply paint, clean your brush, and push your brush towards the paint so water can diffuse through it. Loaded brush blending is a method combining both wet blending and feathering techniques.
Non-Metallic Metal (NMM)
This method allows you to make something look like metal without using metallic paints and is an advanced painting technique. It can be useful to learn this method to have more control over which areas of your miniature looks reflective.
Metallic paint is very shiny and makes it hard to accomplish smaller nuances of shading or highlighting. The NMM technique allows you to dictate exactly where the light is bouncing off your model.
Since metal is highly reflective, the main component for creating the look of metal is using contrast. Where the light catches metal, it will shine bright and be dark where there is no light. The dark and light colors will also be right next to each other.
Contrasts will be more extreme the more reflective the metal is. Kujo Painting has a video explaining how light reflects on objects and how to find highlights for painting NMM.
Object Source Lighting (OSL)
If you have mastered the art of blending, you can take these skills one step further and create an OSL. This effect creates the resemblance of something glowing or casting light around the miniature.
For this technique, you want to create a source of light that is the brightest area on your model. The light then travels out from the source and diminishes in brightness the further away it goes.
For a glow effect, you can use white to create the blend for the illuminating light source initially, then use an ink wash to add color. For example, start with a white circle, then use layers to blend the edges outwards and gradually lighter.
Then go over the white with a yellow wash before adding some more white in the center and brightest point. The Creative Twilight website details this technique with image samples.
Conclusion
Using this resource and the tips on painting your miniature, you can confidently get started and look forward to building your skills. With so many types of models to purchase and games to play them with, miniature painting is a hobby you can enjoy for years to come.


