
Whether it’s for background ambience at work, some gaming tunes, or just lazily hanging out with friends, everybody loves listening to many types of audio. Be it podcasts, videos, or music, everyone wants to do one thing – and that is to listen. Sure, I may sound like a cringe-y Spotify ad, but it’s true. That is why companies are making a killing from selling a lot of equipment that audiophiles eat at a drop of a hat. Every music listener now owns a piece of ear gear that promises delivery of “High-Fidelity” or HiFi music. All people needs to do is connect them to a music source, like a Mac or PC and they think they are done. That’s it, plug-and-play.
Boy were people dead wrong about this.
You see, HiFi audio playback isn’t all about the external gear we use. It all begins with the source or the point of origin which the audio is playing from. In this case, it should be either your Mac or PC. The playback should be solid from the get-go, ensuring that the listener can enjoy any type of audio playback in the best possible way.
As you may know, there are a lot of media players in the market, and a lot of them are quite good to be honest. But I have my share of experiences in recording music (I was a drummer from a band), and I tell you, half of the things we listen to have a lot of unwanted noise that we, as creators, would not like our listeners to hear. Or sometimes, there are things that we would like you to hear, but certain digital interferences eliminate the sounds we make, leaving listeners thinking that “There’s something missing” from our music. This is quite frustrating, since we did pour a lot of effort to create something good.
So how do you optimize audio from your computer source?
Enter Audirvana
But now, there is Audirvana – the ultimate digital audio playback. Audirvana is an audio streaming and playback service that optimizes your computer to turn all your audio stuff into a HiFi listening experience.

It does this by running three core solutions on your computer, and the output becomes something that is no less than awesome. These three are:
- Control of the Audio Flow – the app takes the reigns over your computer’s audio flow, ensuring the shortest path travels from your source, to your output device. They use an intricate web of programs that minimizes audio signal paths, and a mixer with their own algorithms that reduces unwanted latency.
- Noise reduction – since our computers are running on electricity, it’s safe to say that they do experience electromagnetic activity. These activities can ruin sound reproduction, resulting in poor audio playback quality (a.k.a extra noise). Audirvana cuts off these unwanted shocks and interference due to electric currents and more.
- DAC Adaptation – unknown to a lot of PC or MAC owners, the digital-to-analog converter (DAC) is a critical process of every computer. The converter transforms the digital signature of an audio file to analog before releasing it to a speaker. What Audirvana does with this is to further shorten the path of this signal by emitting a “ready-to-play” audio stream. This reduces the amount of necessary tasks that your DAC needs to perform.
In simpler terms, Audirvana eliminates all unnecessary actions that an audio playback needs to go through before it reaches a sound output device. This in turn, lets users hear the best quality listening experience they could ask for. A much more detailed explanation for their technology can be found here.
Audirvana: A Review of the Service
We had the opportunity to get ourselves a license key for Audirvana. As an audiophile, I couldn’t pass this up, and lucked out on doing a review on how the app works and feels. I will try to be as objective as possible, and list down things that caught my attention.
Downloading and Installation
From the get-go, getting Audirvana on your machine is as easy as 1-2-3. There’s a large “TRY NOW” button on the upper right side of their homepage. Clicking on this will transfer you to another page in which you have the option to download the app on a Mac or Windows, depending on what computer you are using.
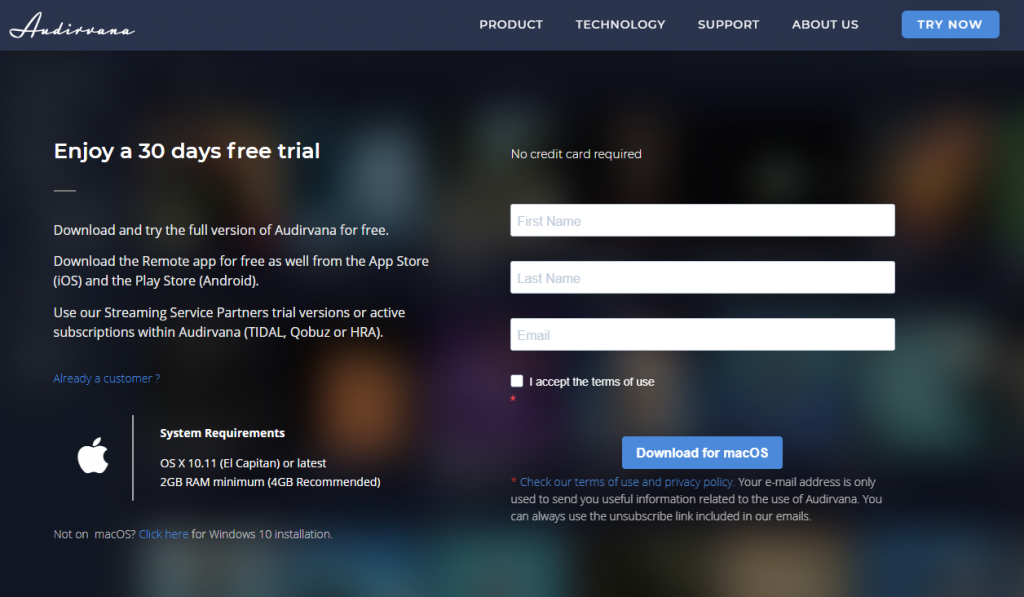
By the way, this page is a “try it out” page that will let you download the app for free and try it for the next 30 days. No immediate credit card details are required, just your name and E-mail account. There’s also a prompt to download a mobile remote where you can control Audirvana using your mobile device. This is great if you are in, let’s say a house party, and would like to control your music even when you are mingling with people.
When I was trying out Audirvana, I went for the Windows version since I’m using a PC. It brought me to a page where it was downloaded through the Microsoft store.
For me, anything that has something to do with the MS Store bummed me out, really. Things become quite tedious to edit and make work because apparently, the MS Store doesn’t like people touching their files. While this protects the companies signed with them, users are somewhat perplexed on finding solutions if something goes hairy. For example, Audirvana loses some of the features when it is run on Administrator mode on the PC. Users that have permanently turned on the Admin mode on their PC will need to go through certain hoops just to get this turned off, which subtracts a little bit on usability.
Personal Thoughts: While it’s easy to download and install, the MS Store installation kind of hinders users from fully enjoying the app on installation. Not a major thing though.
Operating Audirvana
If you are familiar with how media players work, then operating Audirvana should be a cinch.
First, you will be presented with the main user interface (UI) where a list of tracks, albums, and artists will be once you port them over to the app.
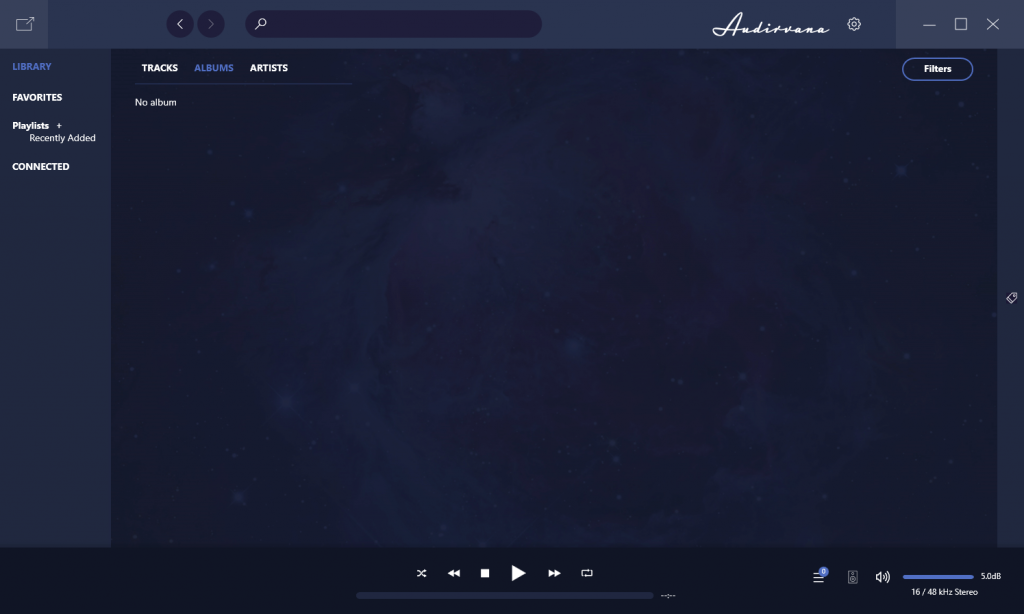
I was so excited when I installed it that I think I forgot if it asked me what my DAC will be, but no worries, you can always check it whenever you want. Just click on the speaker icon on the lower right of the window and it will show you several options on what it recognizes for your audio output.

As you can see, I’m using the Windows Audio Session API (WASAPI). Audirvana detects that I am using two modules for my Realtek Digital Output, one for the actual program (that I am too lazy to set up properly) and another Realtek Audio output connected to a speaker. In this case, that speaker is my Audio Technica Solid Bass headphones. Another thing it detected is my USB headset that I use for work. But what really surprised me is that it also detected my TV over the network. I tested it, and it sounded really well!
Next is uploading your audio tracks on to Audirvana. To do this, you need to click on the gear icon on the upper right of the UI. You will be taken to the settings of the app. There are five categories in there, namely General, Library, Streaming, Sort Criteria, Maintenance, and Miscellaneous. Library and Streaming will be open upon arriving at this page.
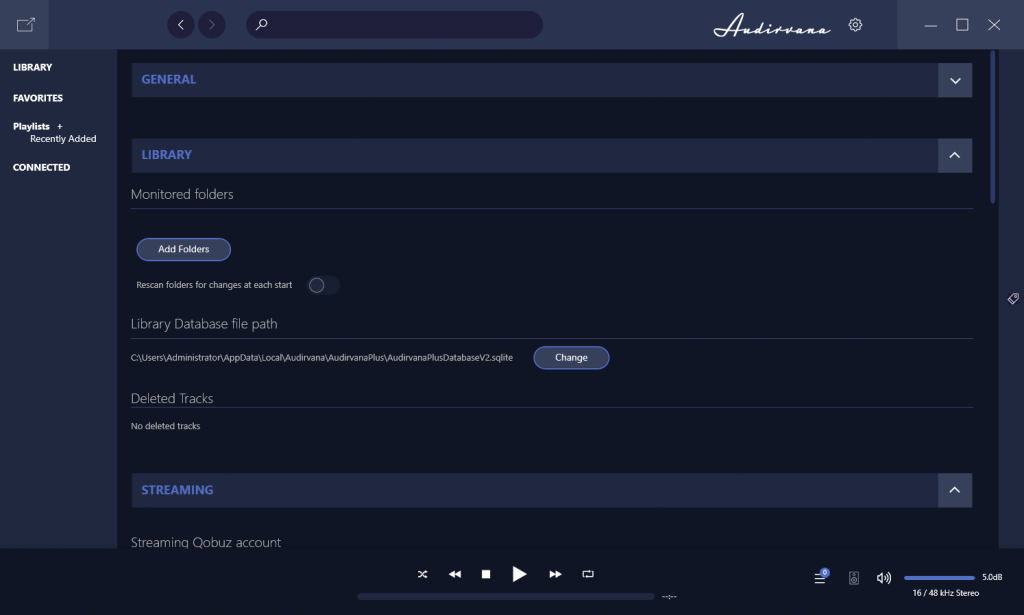
Since we are going to upload our music, we should go over to Library, and click on Add Folder over at the Monitor Folders section.

A great thing about Audirvana is that you can upload and monitor multiple folders all at once if your audio tracks are located on different file paths on your computer. Also, let’s say that you are continuously uploading tracks on your folders. There’s a function that you can turn on or off in which it will re-scan the folders for changes and automatically add or delete music from the uploaded list on the app. This saves you time from manually adding the new stuff all the time. This check is done whenever you restart Audirvana.

Once you have done that, all your tracks will be shown on the main screen of the app.
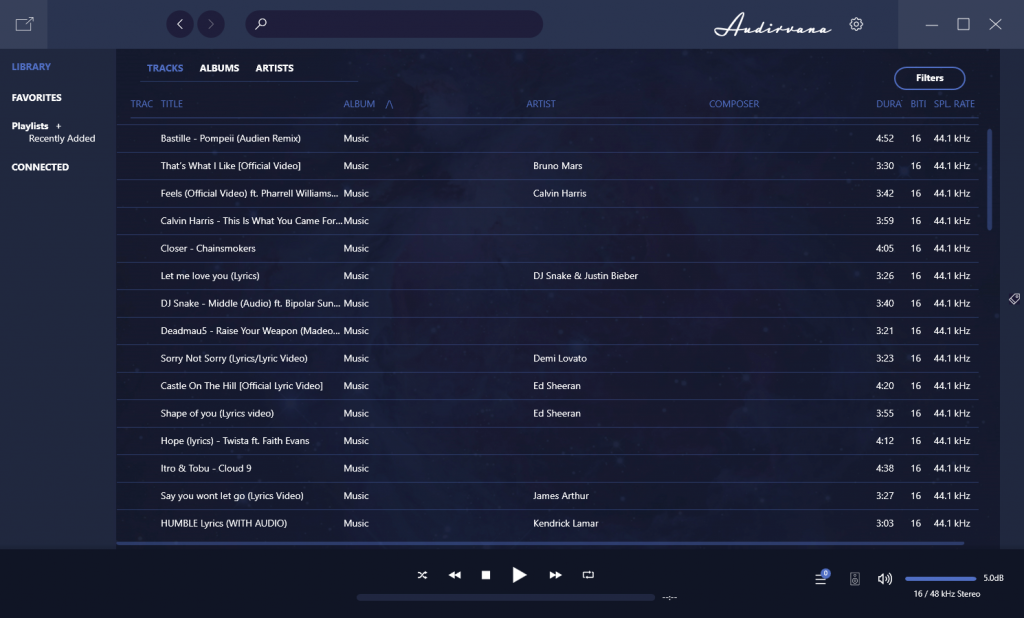
If you have a Tidal, High-Ress Audio, or Qobuz account, then you can also connect them to Audirvana! This is actually one of the coolest features that this app has. All you have to do is scroll down on the settings menu over to the Streaming category. You can click on “Connect” and it bring up another window in which you will be asked to login to either of those three services.
Once you have done this, it will sync up the server and you will be able to see your audio tracks on the main screen of the UI as well.
Personal Thoughts: For ease of use, Audirvana gains top marks. The ability to easily upload audio tracks and even connect to audio streaming service is a great boon. If the company decides to connect to more streaming services, like the widely used Spotify, for example, then it would truly be an all-around hub for all your audio playback needs.
Advanced Settings
Ok, this will be quick, as this review is supposed to be for new users anyway. There are several advanced settings for the audio playback’s sound output. If you click on the speaker icon again, and look at the DAC available on the screen, you will see a tiny arrow beside the available options for your audio converter. Clicking on this arrow will direct you to some advanced settings for your DAC.
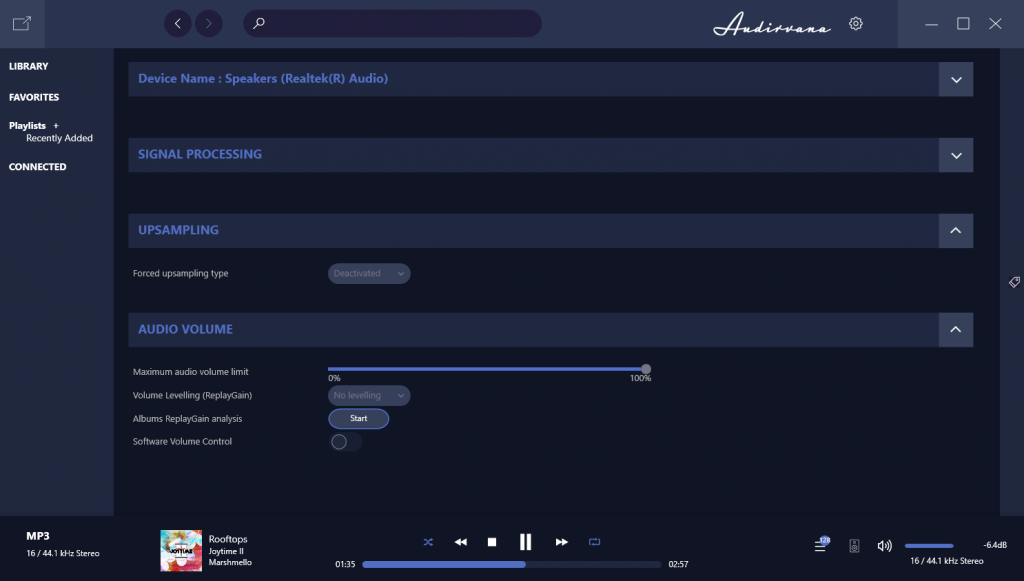
In this menu, you have the options to tweak several things:
- The DAC device you are using/will be using
- Signal Processing, which has an option for users to use VST3 plug-ins if they prefer
- Upsampling, which include x2, x4 and other upsampling options
- Audio Volume
If you are a seasoned user of audio playback software, then you should know what these settings are. It’s a whole another topic to discuss what each of these do, after all. If you have no need to adjust anything, then you can leave these as is, and the output would still be phenomenal.
For those who are OC on their tracks, there is also an option to edit metadata on each of the tracks. All you need to do is to go back to the main screen, and lick on the pen tip-like icon on the far right of the app.

After clicking this, you need to click on the tracks that you would want to edit the metadata on. Several information will be shown regarding the audio file. Below those information, there will also be some boxes in which you can input the information you want and edit each metadata properly.
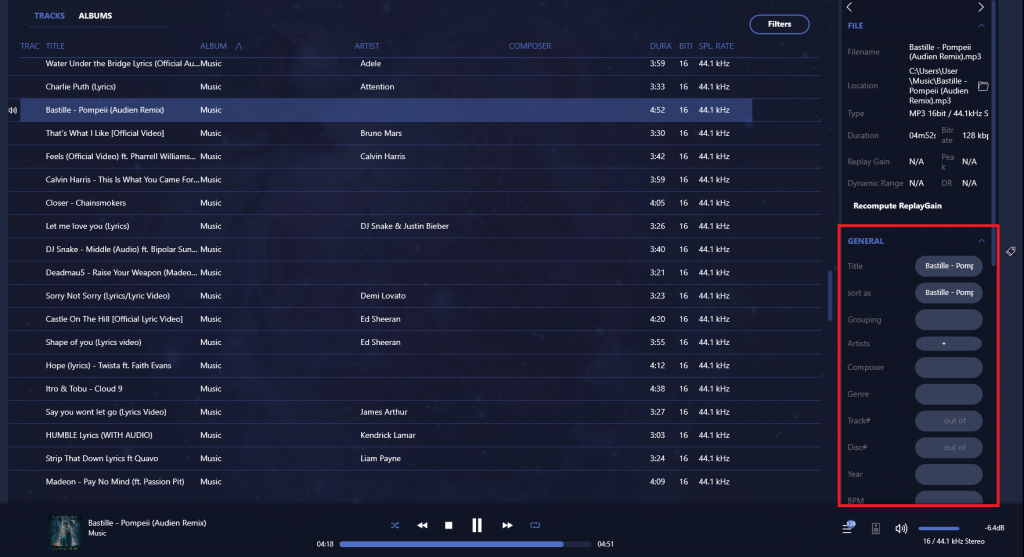
There’s even a comment box, if you ever feel the need of such a thing.
This is great for those who want to organize music in a more personal manner. For example, if I want to group several tracks via the artists, I can easily do it. This will enable me to use the Artists menu and find my tracks easily if ever I suddenly feel like I want to just listen to a certain artist depending on my mood.
Personal Thoughts: There are tons of advanced settings that will be perfect for the audiophile in you. I really like the DAC settings that I can tweak, since I use different devices after all. This lets me further tell Audirvana what I want the output should be on my devices, and it will process everything to give the most optimal output possible.
Final Verdict
Audirvana is a great audio playback app, hands down. And I’m not saying this out of nowhere – I’m willing to bet my entire music playlist (and my pride as a musician) on the quality of this app. The sheer quality of the HiFi audio output alone is enough for me to keep using it. And with the added settings that will have me further tweaking things is exceptional.
If you have the time to try this out, then I highly recommend it. You have 30 days of free trial, so use it as much as you want. If you have thoughts and questions about Audirvana, or if you would like an in-depth guide to usage and settings, feel free to leave a comment below!


Good info. Question, is this only an app for when you are using a computer such as a laptop to improve the sound quality. Or can you also use it as well having a music server/streamer such as innuos zen mini 3 feeding your DAC?